

Debugging any WordPress Projects Using debug.log


Video for those who hate reading > https://youtu.be/g1oPKoNOmpo
\===== Readers Keep reading ======
WordPress is a very famous CMS on the internet and it is open source. There are many WordPress Developers out there making some cool stuff by using it.
WordPress is made of PHP, Javascript, React and of course CSS;)
So in this post, we are going to see how WordPress developers debug PHP while development.
First of all, we have to add the following lines to the wp-config.php file.
define( 'WP_DEBUG', true ); // Enables the debugging.
define( 'WP_DEBUG_LOG', true ); // Enables a log file called debug.log
define( 'WP_DEBUG_DISPLAY', false ); // Prevent displaying error on the website.
That's it. Our WordPress site is ready for PHP debugging.
Now open any file where you want to debug and add this line if you are debugging for Array OR Object.
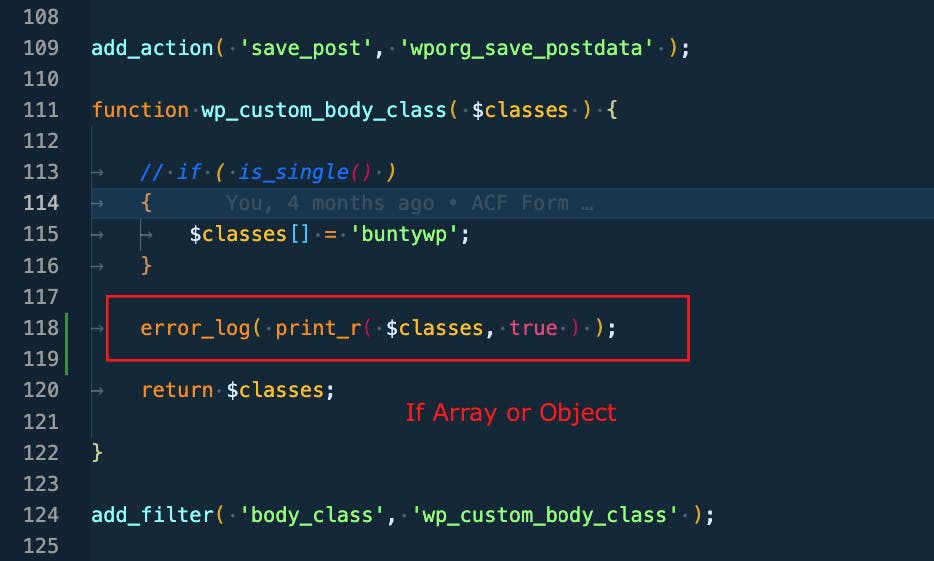
We are using "error_log" function which writes the value inside debug.log file.
After adding this, visit the site page on your browser, where you expect this debugging code to be executed.
Now open the terminal and go to the wp-content folder. Our debug.log will be generated there and run the command "tail -f debug.log" and hit enter.

After hitting enter, in the terminal, it will start displaying the content of debug.log file

Now whenever you do error_log() for any variable, it will display the values of that variable in the debug.log.
If variable is non-array or non-object, then you can use error_log as shown below:
`error_log( $var );`
Whatever you write using "error_log" will be written inside debug.log file.
By using the "tail" command, you will see the file written on the fly, meaning you don't need to write the command again and again to see the debug code.
That's all !! Happy Debugging !!!